WordPress currently powers more than 26% of the web, with users sharing 41 million new posts every month.
Its popularity in part due to its versatility and power. But for beginners can be overwhelming. There are so many options – posts, pages, themes, plugins – it’s a lot to take in when you are just getting started. To help those new to the world of managing their WordPress website, I am launching a series covering everything you need to know.
I’m going to show you ‘How To Post A Blog On WordPress‘, guiding you through each section and the elements that make a great blog post.
LET’S GET STARTED…
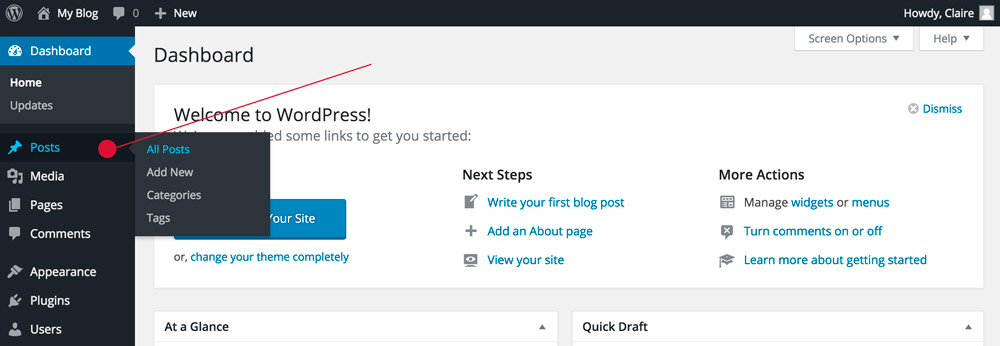
From your WordPress dashboard, click on the ‘Post’ link from the left-hand side menu. Upon clicking on the menu, you’ll see the ‘Add New’ link, select this.

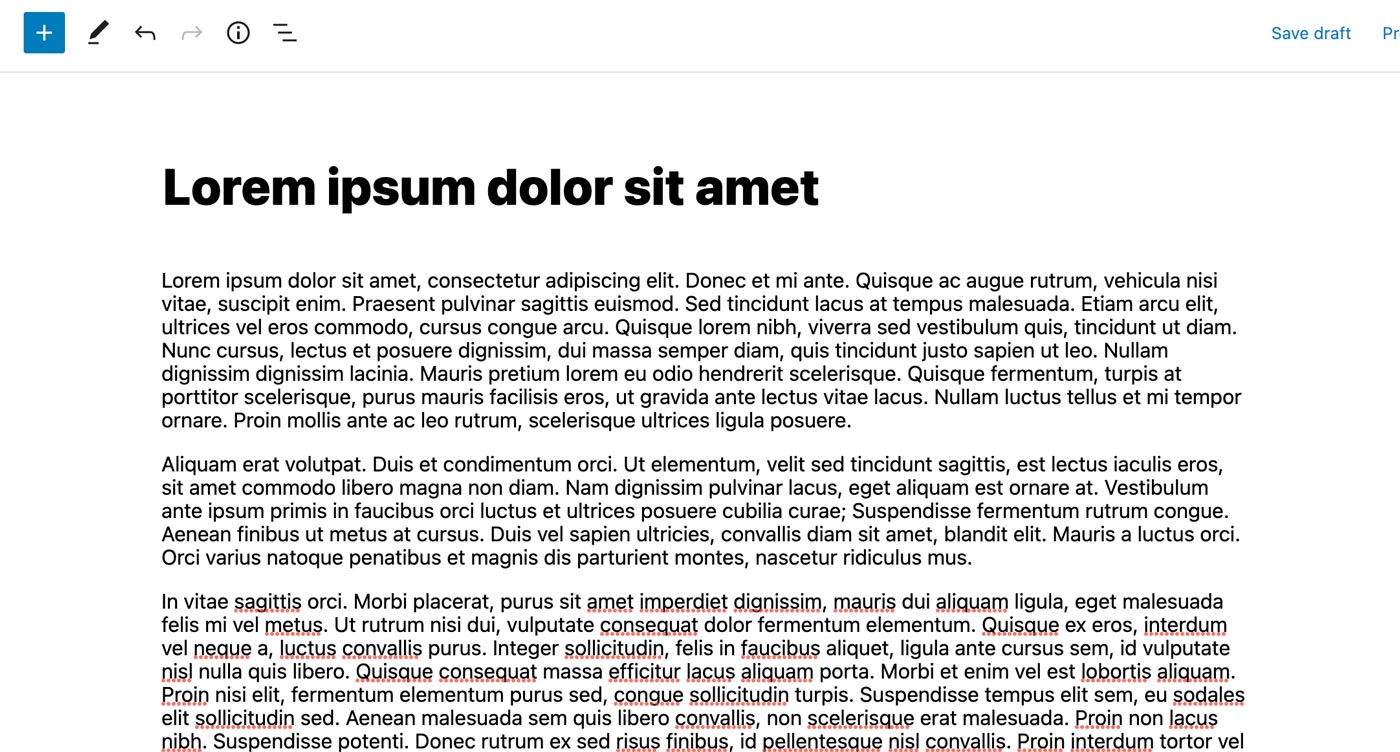
Now we have a blank ‘Add New Post’ page.

POST TITLE
The title is an essential parts of your blog post. This is the first box on the left-hand side.
Your post title should be descriptive and ideally include your keywords. For example, this post is about posting a blog so my title is ‘How To Post A Blog On WordPress‘.
POST CONTENT
Next up is the main content box. In here you add your post text and images. The content box is set up to be a stripped back version of a word processor, like Microsoft Word. Giving you the ability to bold, underline text, change the alignment and bullet points for example.
At the bottom of your content box, you can see a quick overview of your post word count and a notification of when the post last autosaved.

The content editor uses blocks. These blocks allow you to add images, video, text, widgets and more. You can add blocks to the post by clicking the + button at the bottom of the content box.
More on post blocks can be found here.
ADDING IMAGES & MEDIA
To enhance your post, you may want to add images or even a PDF file within the text. This can be achieved by click on the ‘+’ button.

A popup will open and you’ll be able to add an image block. This will give you the option to upload a new file or select one from the ‘Media Library’. The Media library contains the files you have previously uploaded to your website.

Before inserting your image into the post, you can add extra formatting – which is recommended as this can help boost your SEO and website accessibility.
The additional settings are:-
- Caption – The caption is added below the image on the post.
- Alt text – The alt text is used by search engines and screen readers as a way of ‘seeing’ what the image is.
- Description – Again this can be used to add additional information to the image.
- Alignment – Used to align the image to the left, right or center of the text.
- Link to – Link your image to another post, page or website or even to the full size version of the image.
- Size – Resize the image to a thumbnail, small, medium, large or full size.

RELATED : How To Boost SEO With Your Website Images
ADDING LINKS
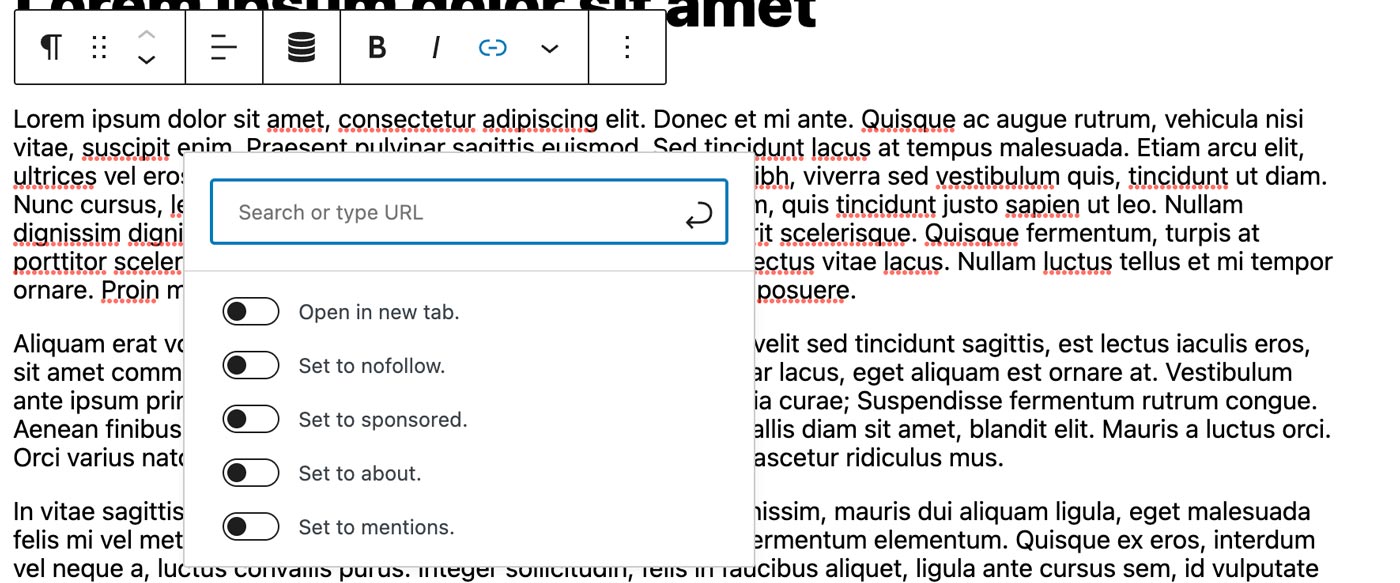
To add a link within your post text, you can use the ‘Insert/edit link’ icon on the visual editor. Highlight the text you would like to link, then hit the ‘link’ icon – a little popup box will appear. In this box you can either paste the URL or start typing to search for a page or post currently on your website.

CATEGORIES
It’s better to organise your posts, which is when you can utilise the category options with WordPress. On the right-hand side of the page, you will find a box for ‘Categories’.
By default, WordPress has a category for ‘Uncategorized’ which doesn’t really with organisation so click on the ‘+ Add New Category’ link to add your own. Possible examples are ‘How To’, ‘Recipes’, ‘Lifestyle’.

Just below the categories box, there is a section for ‘Tags’. These can also be used to organise your post with certain words or phrases.
FEATURED IMAGE
Featured images are usually display alongside your post on your website. And depending on your theme will appear along the top or to the side of the post. This image is also typically displayed when your post is shared on social media.
To add a featured image, click on the ‘set featured image’ link from the box on the right hand side of the page. Uploading the image works in a very similar way to what we did with the ‘Add media’ shown earlier in this post.

PUBLISHING YOUR POST
Now after all that work crafting your post, it’s time to publish it onto your website.
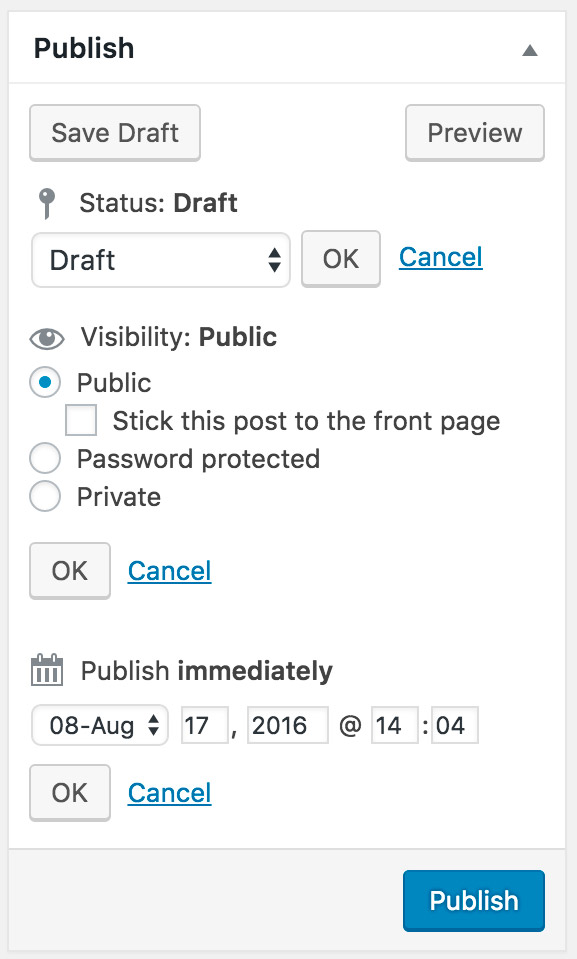
At the top of the post page you’ll find the ‘Publish’ box. You can simply click the ‘Publish’ button if you are ready to add the post to the website. However, there are a couple of other options you can use to tweak your post before hitting publish.
- Status – The status of the post can be changed ‘draft’ if you aren’t quite ready to publish yet or ‘pending review’.
- Visibility – The post can be set to either public, private or password protected which controls who can see and read the post.
- Publish – The post will automatically be published immediately but if you want to schedule your post for a later date you can set that here.
When you’re sure everything is ready, click on the blue ‘Publish’ button.

That’s it, you have now added a new post to your WordPress website.
Do you have any questions about how to post a blog on WordPress? Feel free to reach out to me in the comments or on social media, I’d be happy to help.
If you have a topic or need help with any aspect of WordPress, let me know and I’ll do my best to write a tutorial to help you out.
Are you confused about how to post a blog on WordPress? This tutorial breaks it down for you. Click to TweetShare this with your pals...